Written words are all around us. They fill the pages of books and magazines and cover signs big and small. People who are blind can’t see all these words, and that’s why there is a system for reading and writing that uses touch. This system is called braille, and January 4 is World Braille Day, a time to spread awareness about its importance.
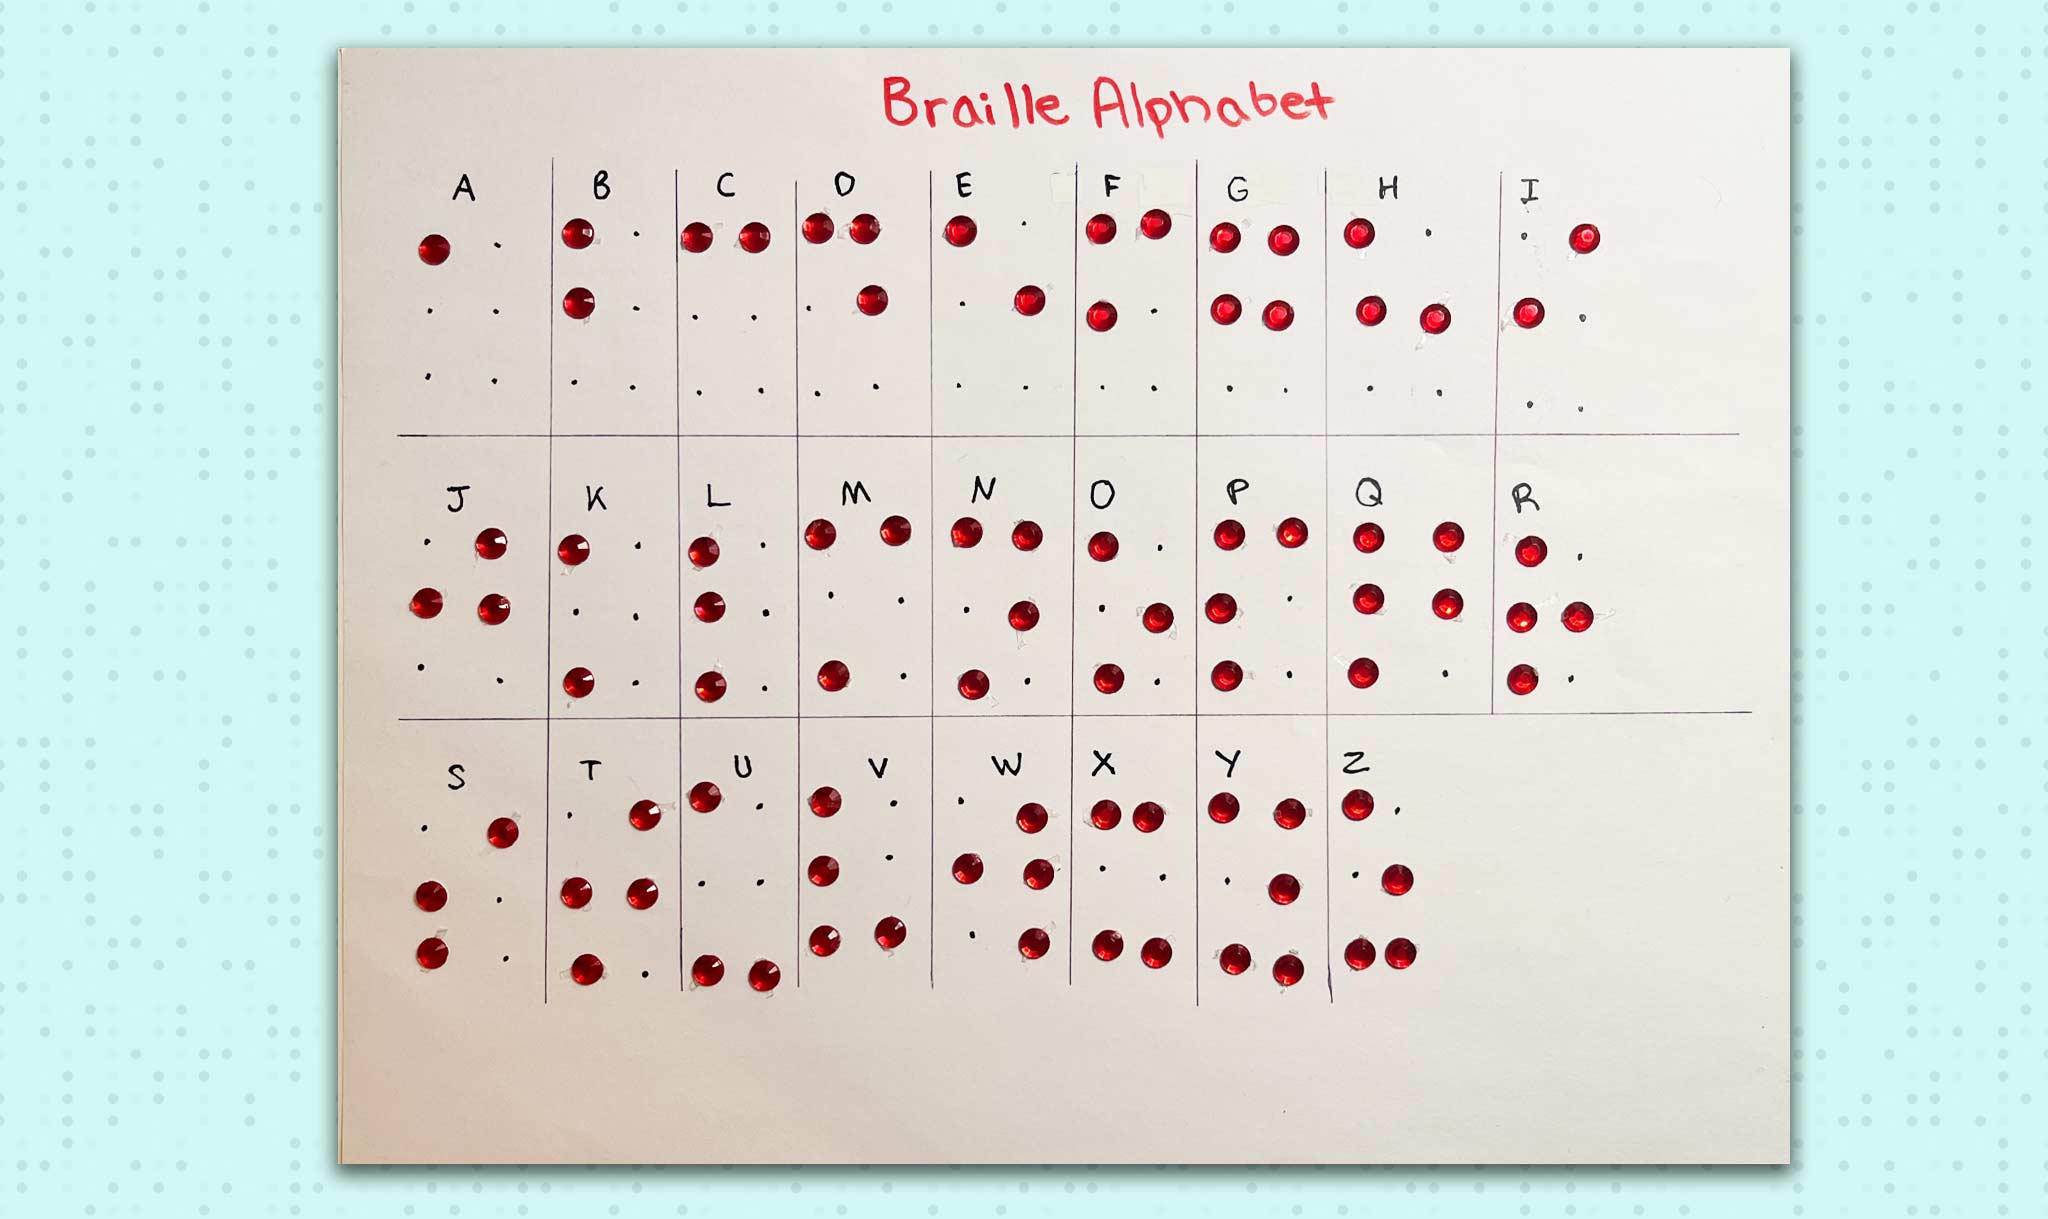
Braille is made up of raised dots in specific shapes and patterns that create words. To read it, a person runs their hand from left to right over the raised dots to feel the letters. To understand how braille works, imagine a grid of six dots, two across and three high. This cell is where all the braille letters, numbers, and other characters are formed. If only the dot in the top left corner is raised, that’s an A. The top two dots would be a C, the top four dots makes a G, and all three dots on the left is an L.
Check the Slide Show to see letters in the braille alphabet, and follow the steps below to make your own braille sign!
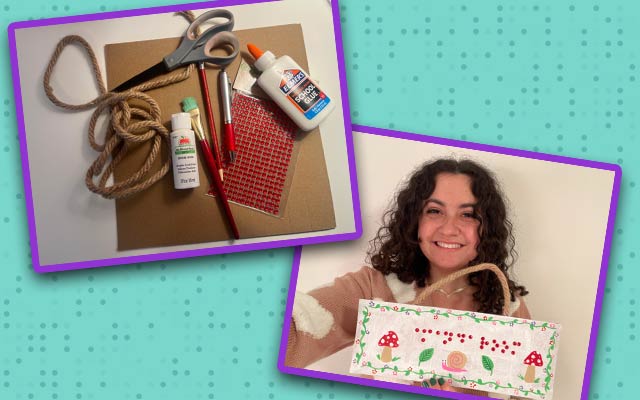
What You’ll Need
• Cardboard
• Gemstones, rhinestones, sequins, or other small, round objects
• Scissors
• Paint in different colors
• Paintbrushes
• Twine, string, or ribbon
• Glue
Steps
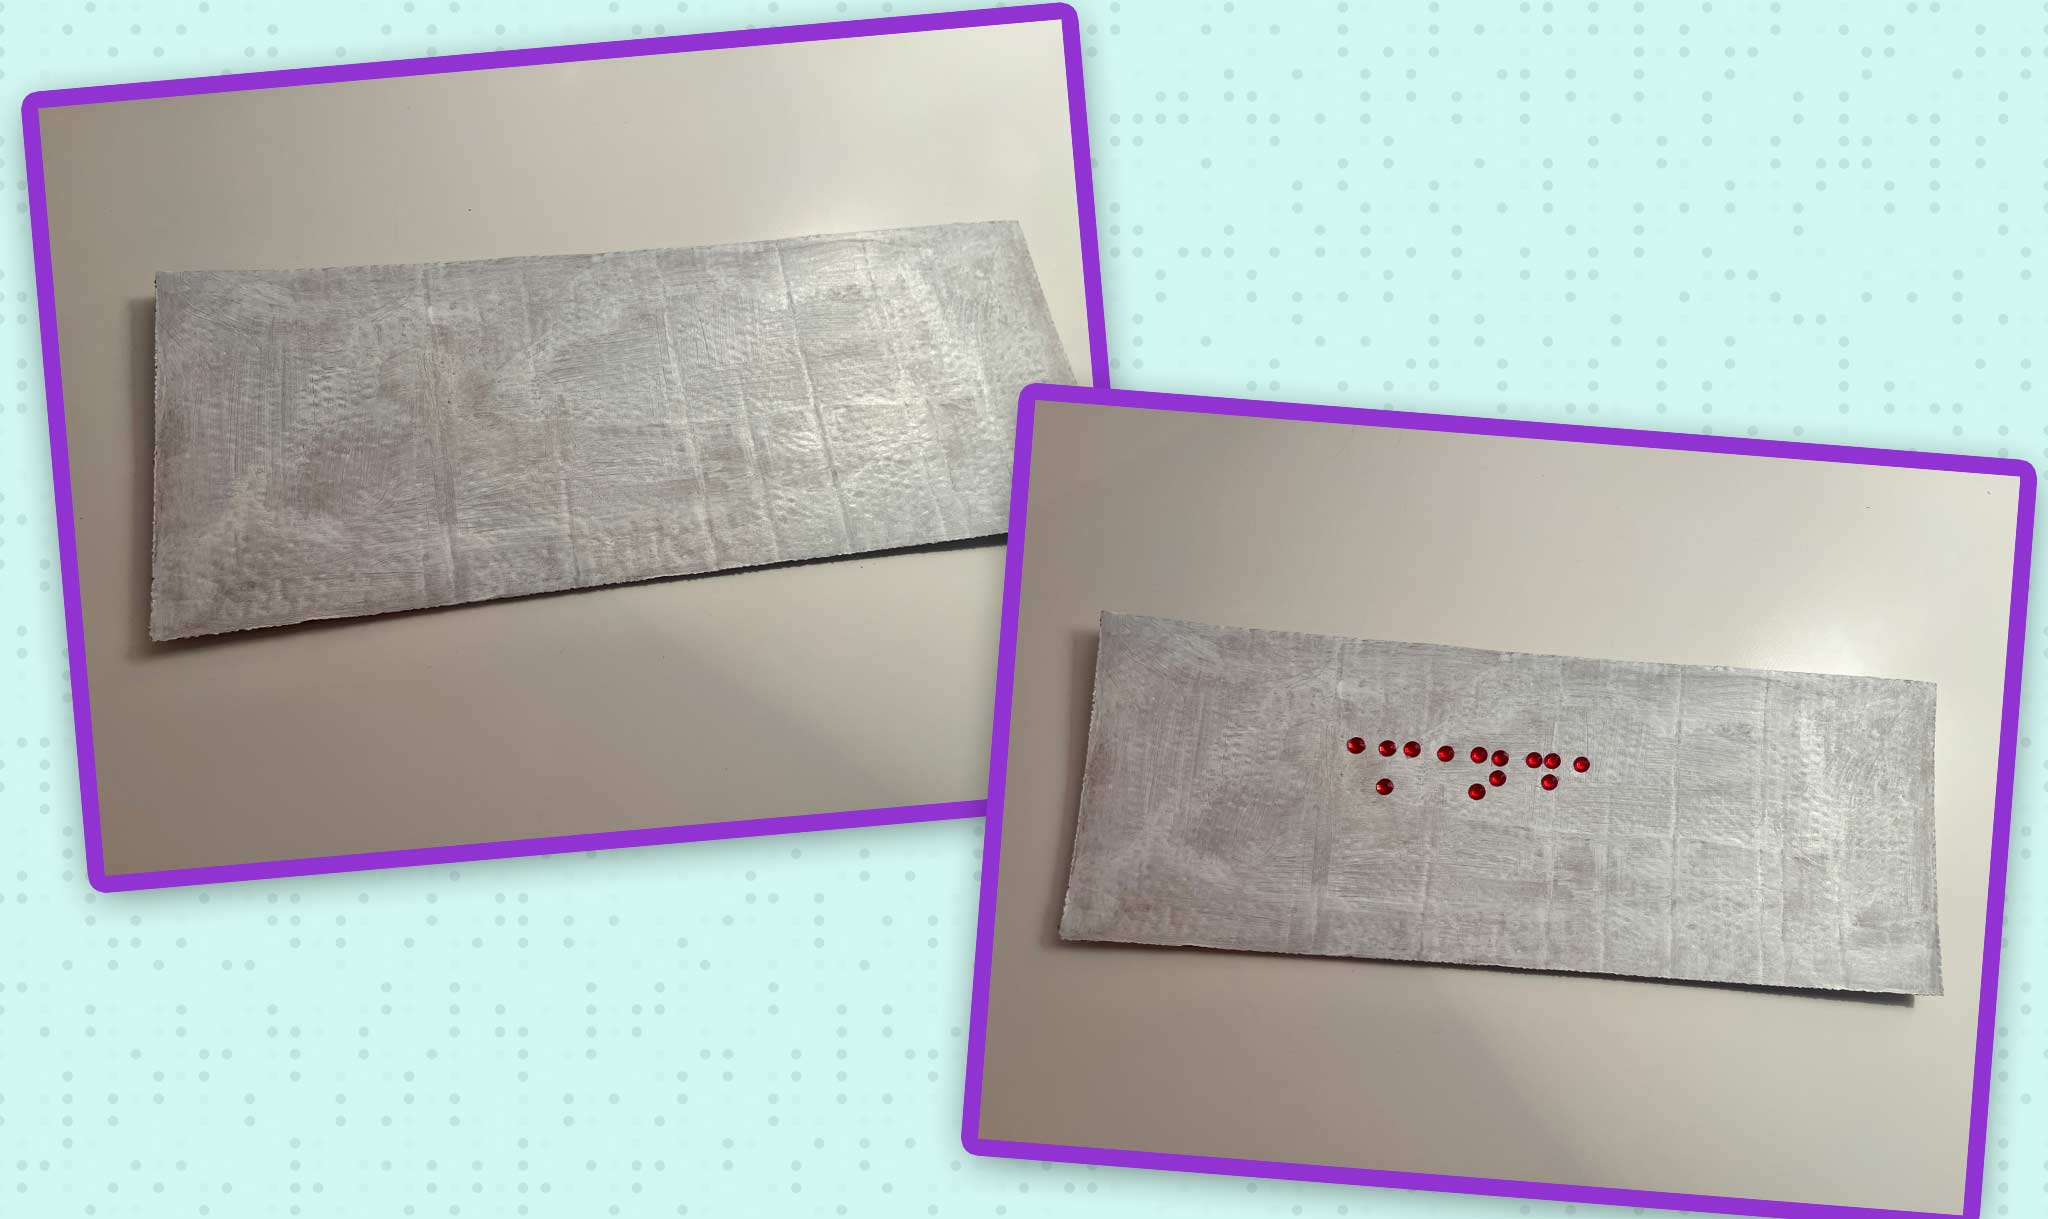
1. For the base of your sign, find a piece of cardboard, possibly from an old cereal box, delivery box, or shoe box. Alternate options include using a
sheet of cardstock paper or even a small, lightweight
.
2. If what you find is not quite the ideal size, you can cut it down to the right shape and size for your name and any designs you want to decorate it with. News-O-Matic used a thin piece of cardboard and cut it into a smaller rectangle.
3. If your sign base is a dark color, you may want to paint it a lighter color or glue white paper over it. This will allow the braille lettering and decorations to show up better. Of course, you can still feel the braille in any color!
4. Study the braille alphabet chart in the Slide Show. Find the letters that spell your name, and pay close attention to where the dots need to go.
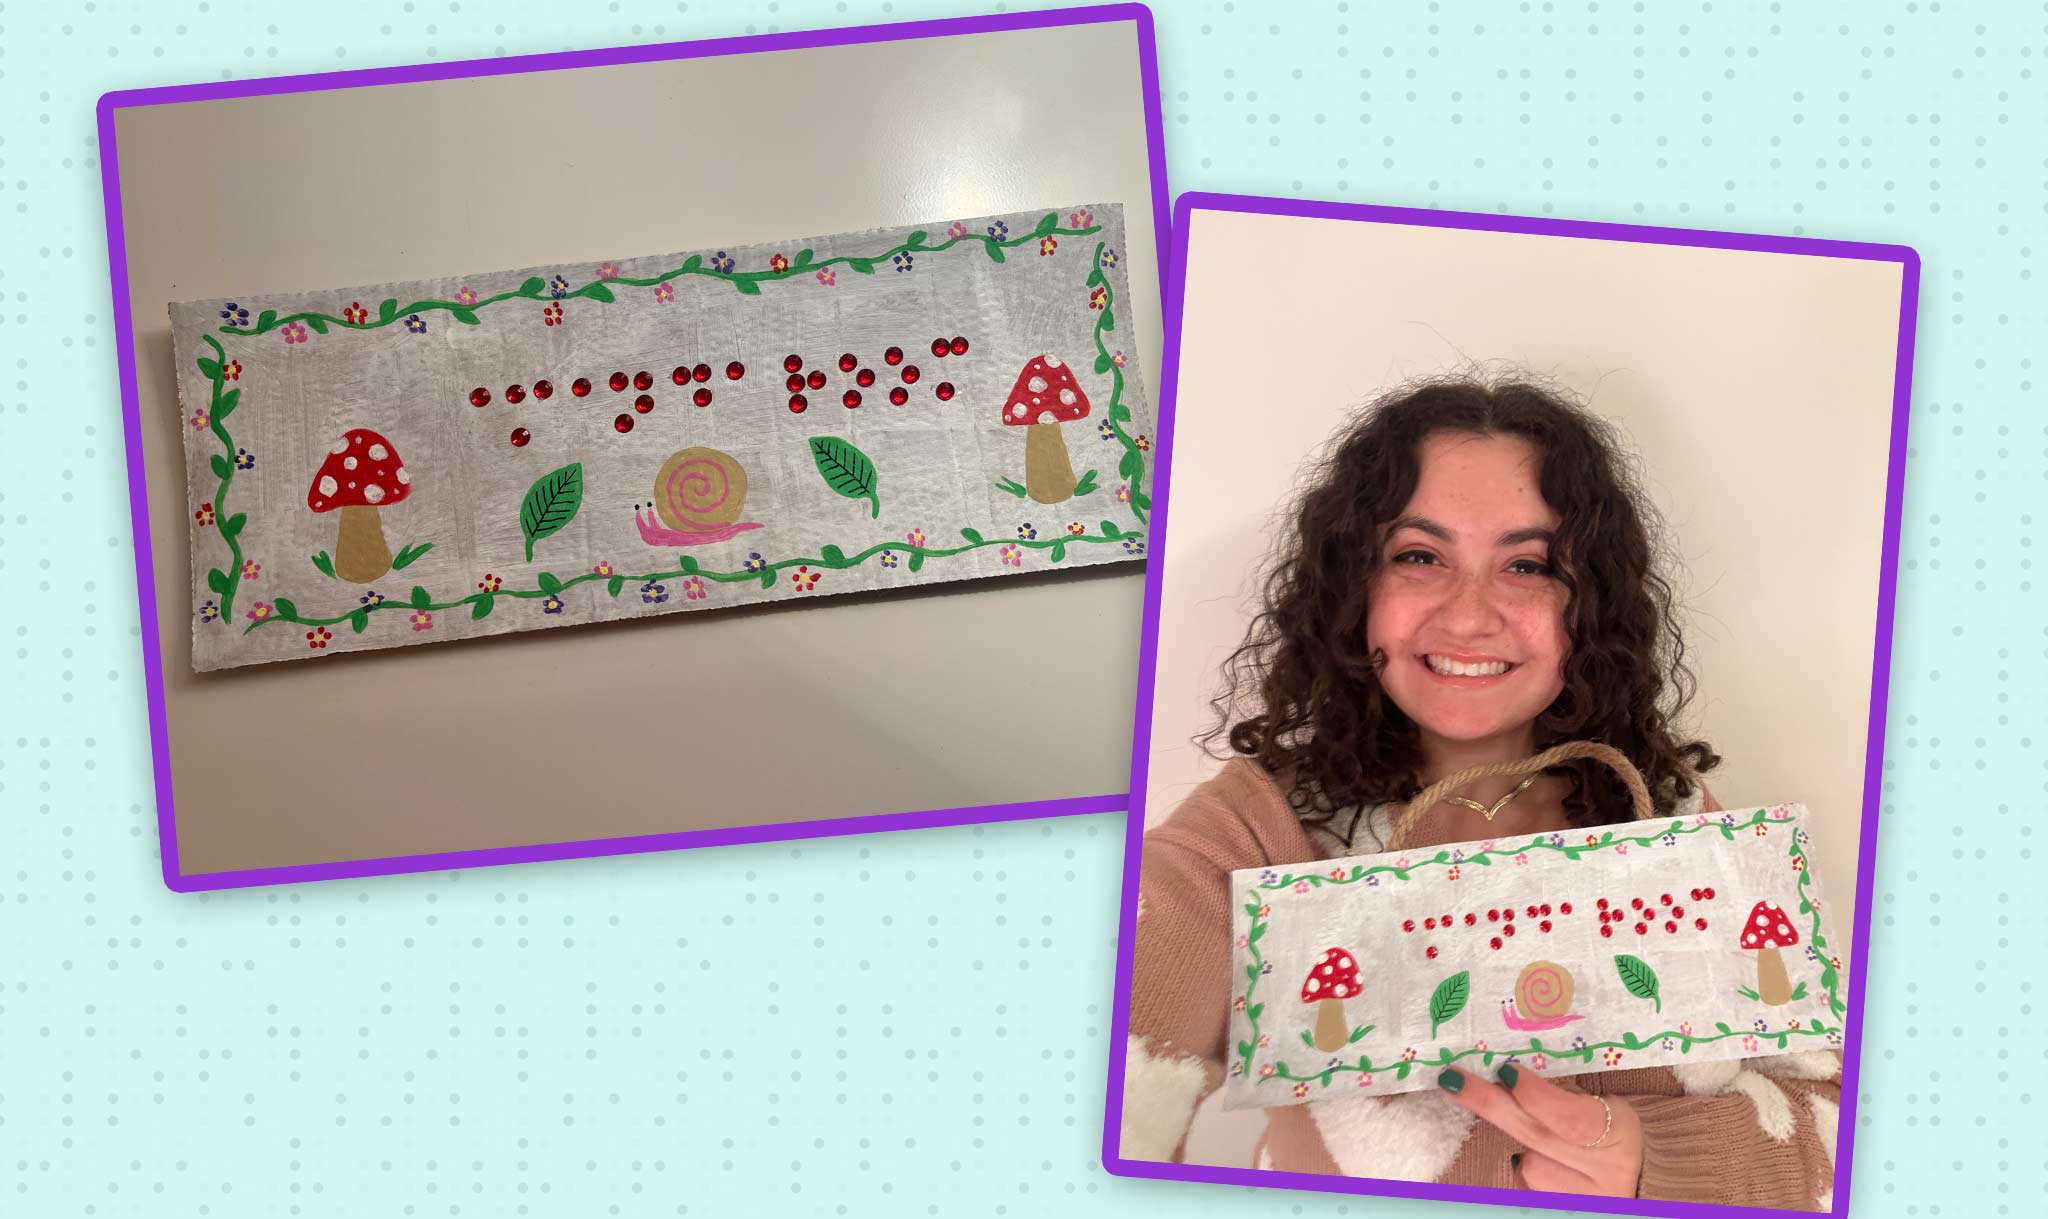
5. In the center of your sign, use gemstones, rhinestones, or sequins to write your name in braille. Make sure that whatever you use is raised, since you have to be able to feel the letters, not just see them. As braille is made up of dots, be sure to use circular gems to write your name. Line up the gems with a small space between each letter and a bigger space between each word. You may want to use a pencil first to mark where each dot needs to go. Once your layout of letters is set, glue or stick down all the gems.
6. Decorate your sign however your want — just make sure to stay away from polka dots, gemstones, rhinestones, and sequins, as they could be confused with the braille writing. News-O-Matic used paint to create a garden scene around the edges of the sign, with flowers, mushrooms, leaves, and a snail! You can pick a theme that best captures your interests and hobbies.
7. Once the decoration is done and any paint is dry, flip your sign over to see the back side. Cut a strip of twine, string, or ribbon, and glue its two ends to the back of the sign to create a hanger. Allow your sign to dry fully before hanging it up to make your space extra special!
By Amanda Salazar
Updated January 3, 2025, 5:00 P.M. (ET)