Spooky season is officially here! It’s time to get in the spirit. Start by making this Halloween skeleton craft to decorate your home!
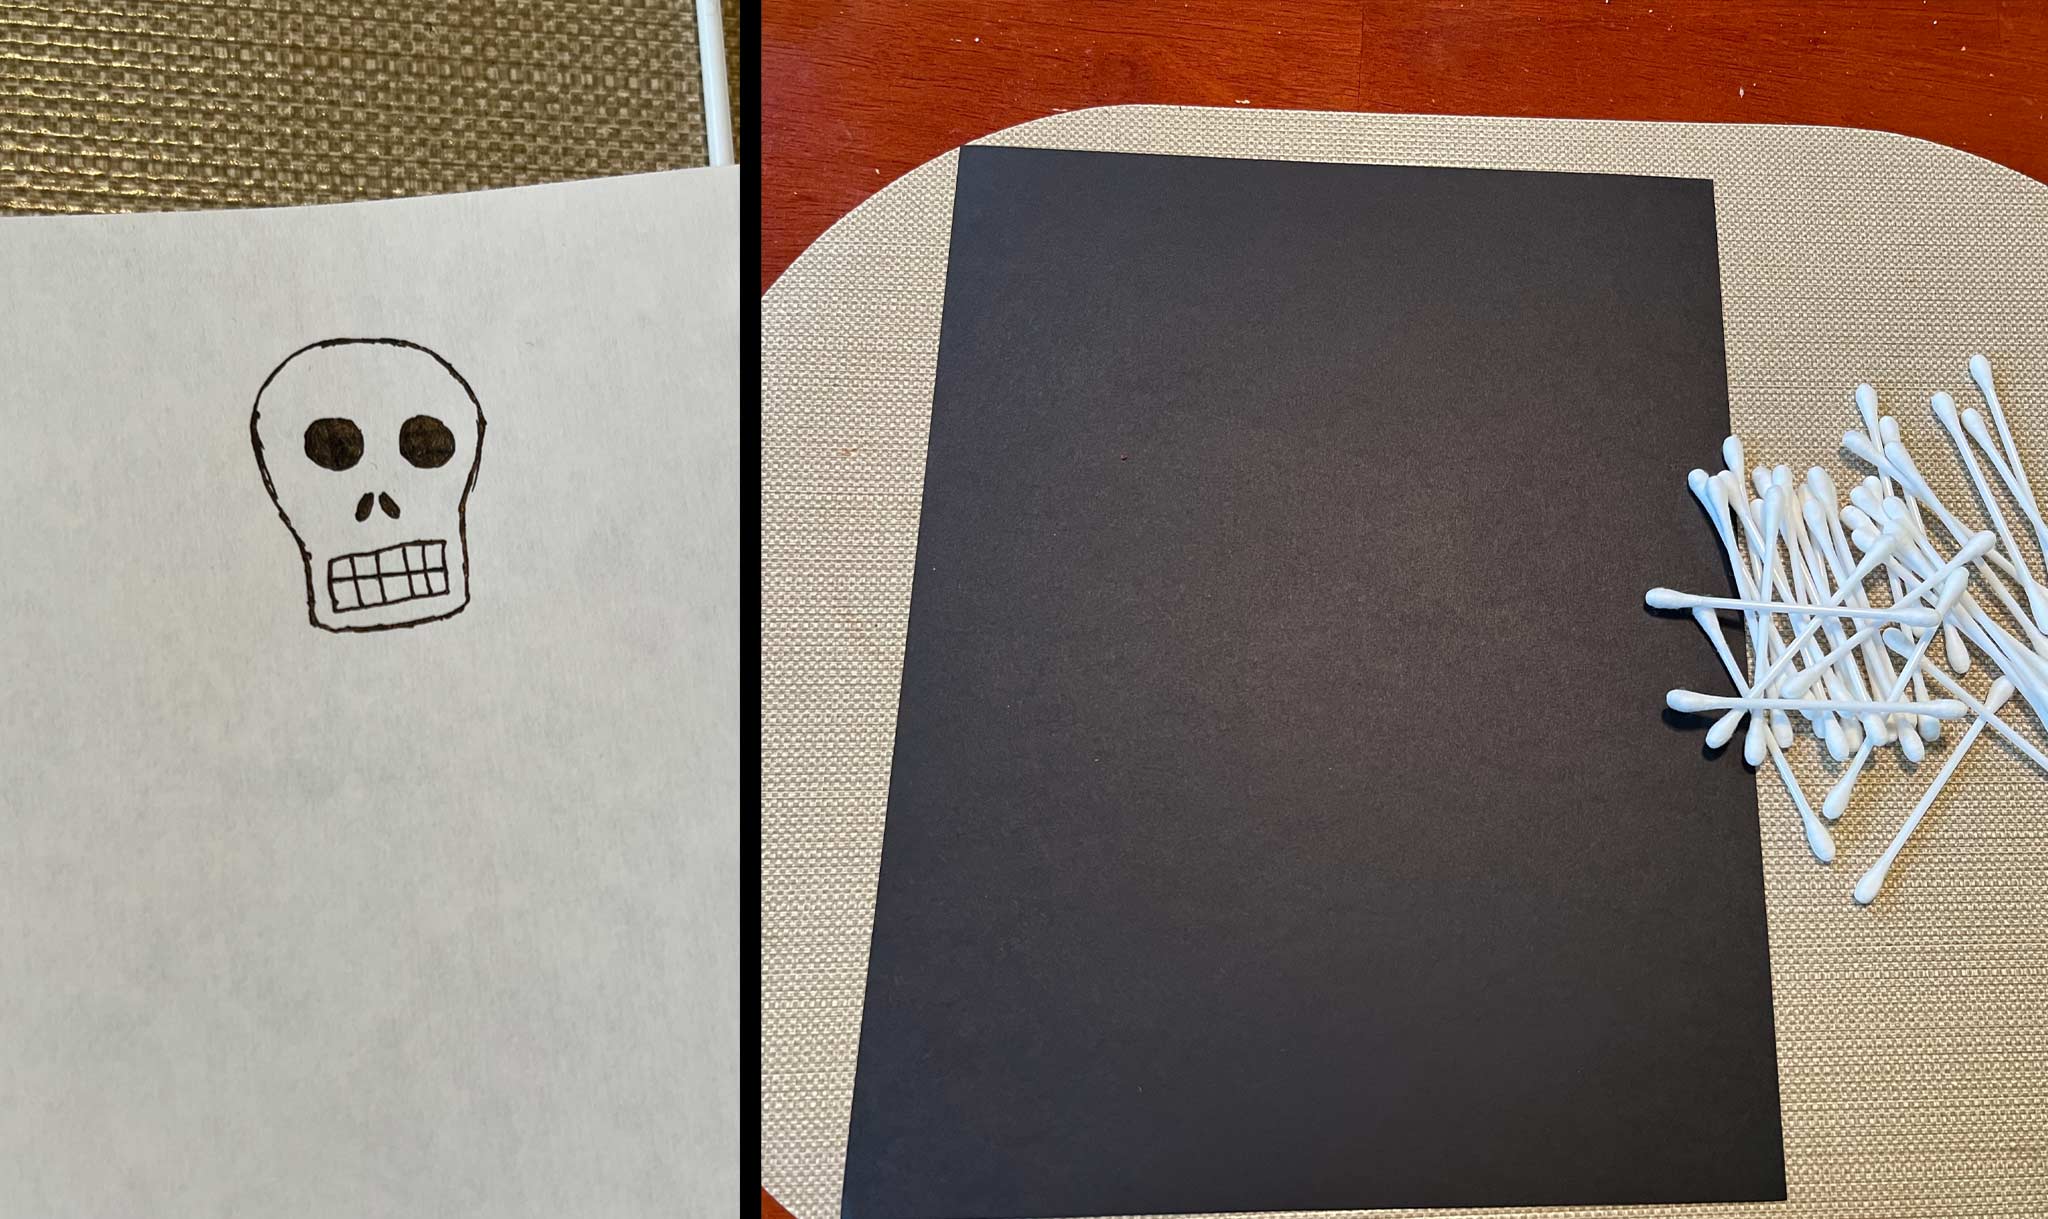
What You’ll Need
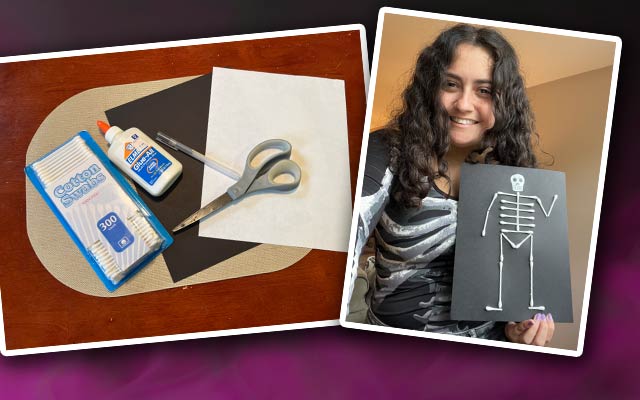
• Black cardstock or colored paper
• White copy paper
• White cotton swabs
• Black pen
• Scissors
• Glue
Steps
1. Spooky Skull
Draw the outline of a skull on the white paper. Look at News-O-Matic’s example for inspiration! Inside, draw two circles for the eye sockets. Sketch out the nose. It is like an upside-down broken heart shape. Fill in the eyes and nose with black ink. For the mouth, draw a rectangle in the bottom part of the skull. Draw a
line through the rectangle. Then draw about four
lines. Those are the teeth! Now, cut out the skull.
Tip: Draw your skull in pencil. Then, outline it in black pen!
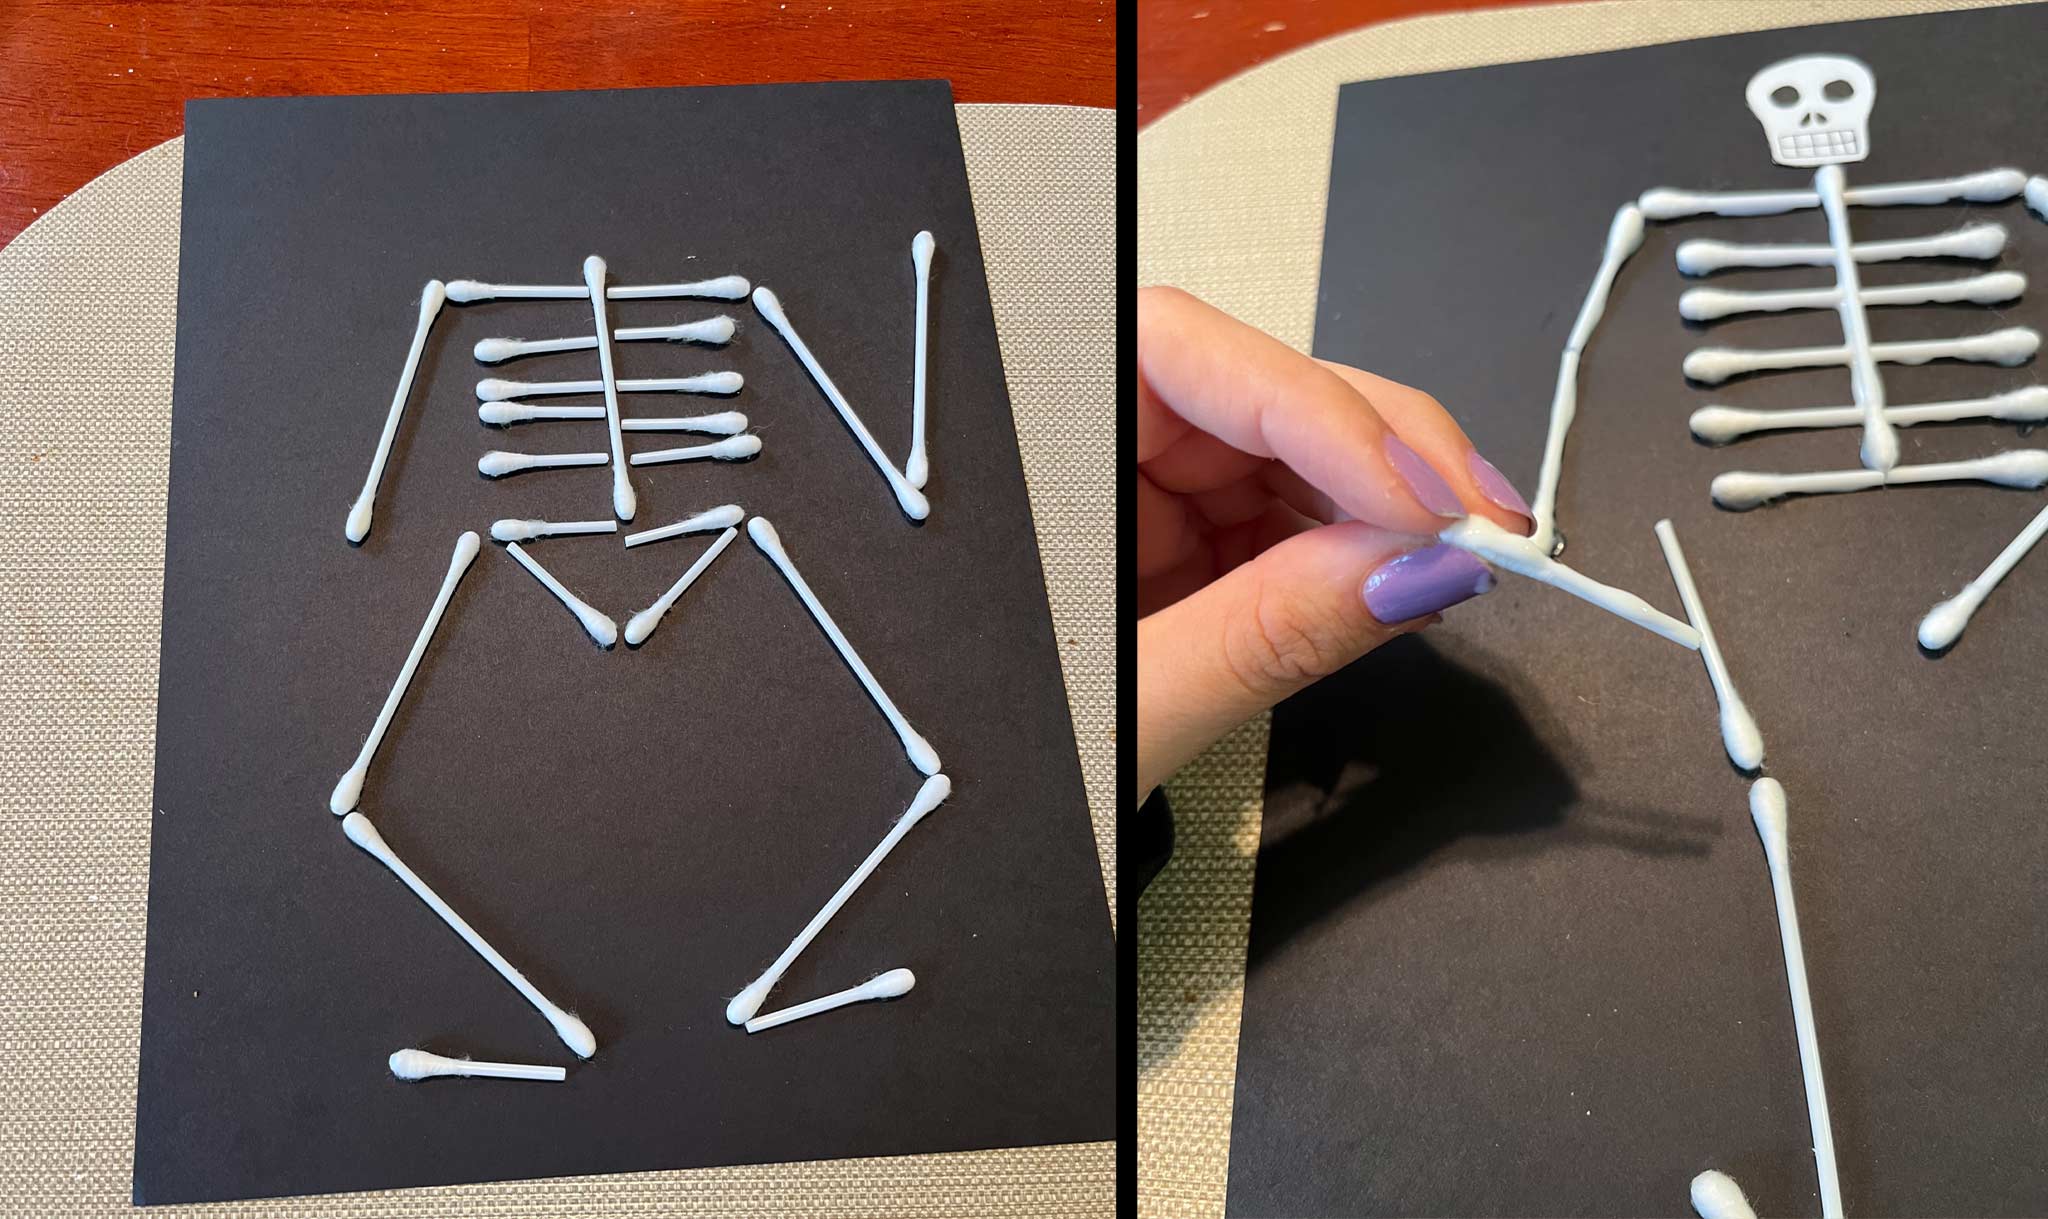
2. Rockin’ Ribcage
Let’s map out the bones on the black paper. Start with one vertical cotton swab. That will be the spine. Cut another swab in half. Place each half on either side of the spine at the top. Those are the shoulders. Cut four more swabs in half. Trim a bit off of each piece. This will make the ribs shorter than the shoulders. Place the ribs on either side of the spine. You should end with four horizontal rows of ribs under the shoulders.
3. Bottom Bones
Now it’s time to make the pelvis. Repeat the same
as with the ribs. But make each half a little shorter than the ribs. Arrange them right below the bottom of the spine. Cut two more halves that are the same size as the ribs. Arrange them into an upside-down triangle.
4.
, Limbs, Limbs
Your skeleton needs its arms and legs! Cut two more swabs in half. These will be the biceps and forearms. Arrange the arms in whatever position you want. For the thighs, cut a swab in half again. Each leg gets one. Then, each calf is made of one full cotton swab. Finally, cut another swab to make the skeleton’s feet. Each foot should be about 1/4 of a swab.
5. Finishing Touches
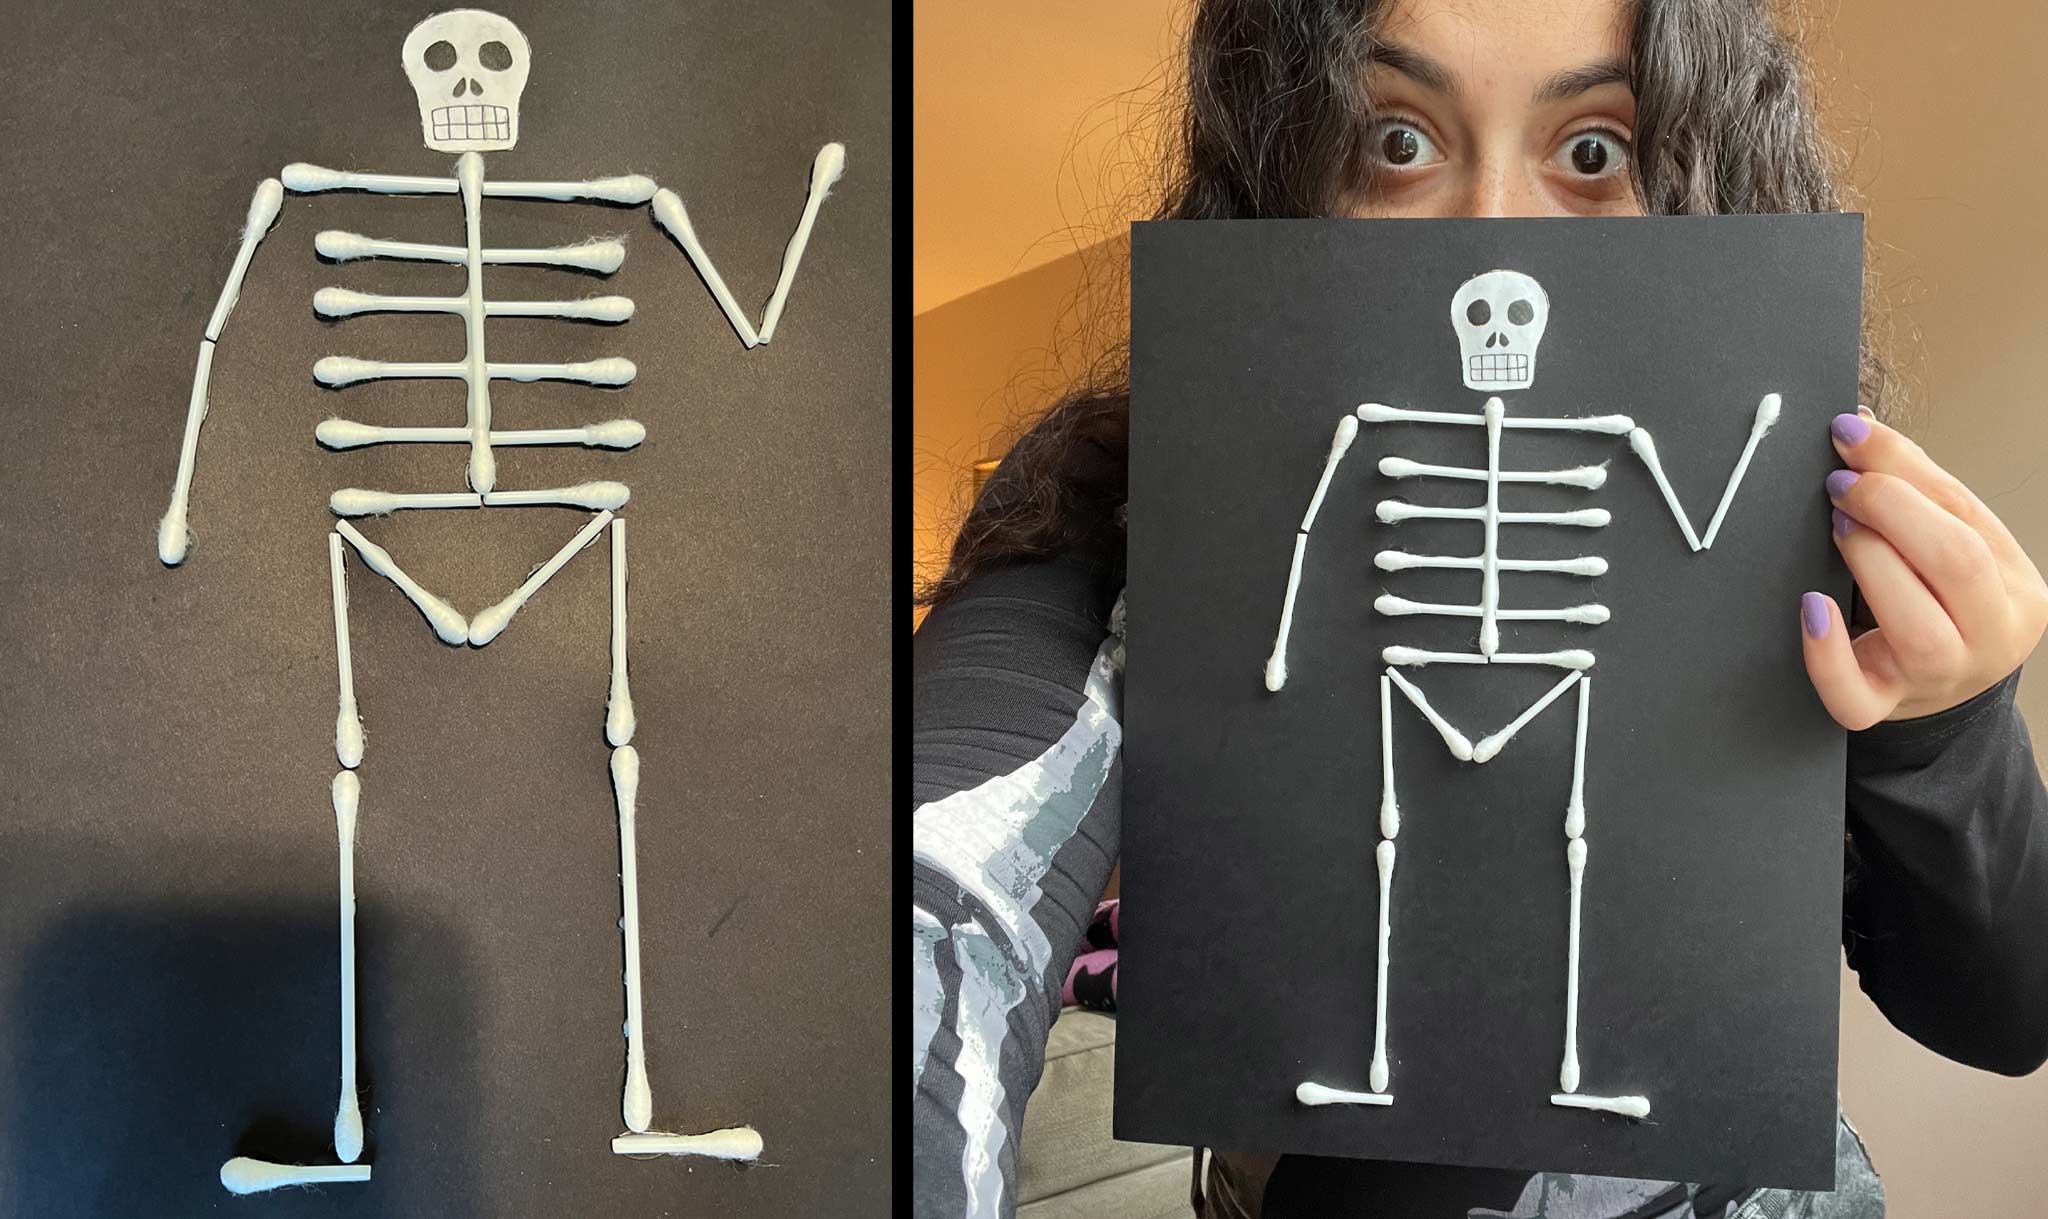
Once you have the swabs in position, glue them to the black paper. Paste the skull right above the top of the spine. If you want, you can decorate the skeleton even further! You may want to add a bow or a top hat to its head. Or perhaps your skeleton wants to hold a booquet of flowers!
And there you go—your boney buddy is complete!
Updated October 21, 2022, 5:00 P.M. (ET)
By Amanda Salazar